
Welcome to this "Making Of" article for my GB-077 Bulldog Concept Tank. I have collected screenshots throughout my process of creating this futuristic vehicle concept design which will show you where to start and how to finish off a project like this. I hope you enjoy the writeup. Please let me know if you have any questions.
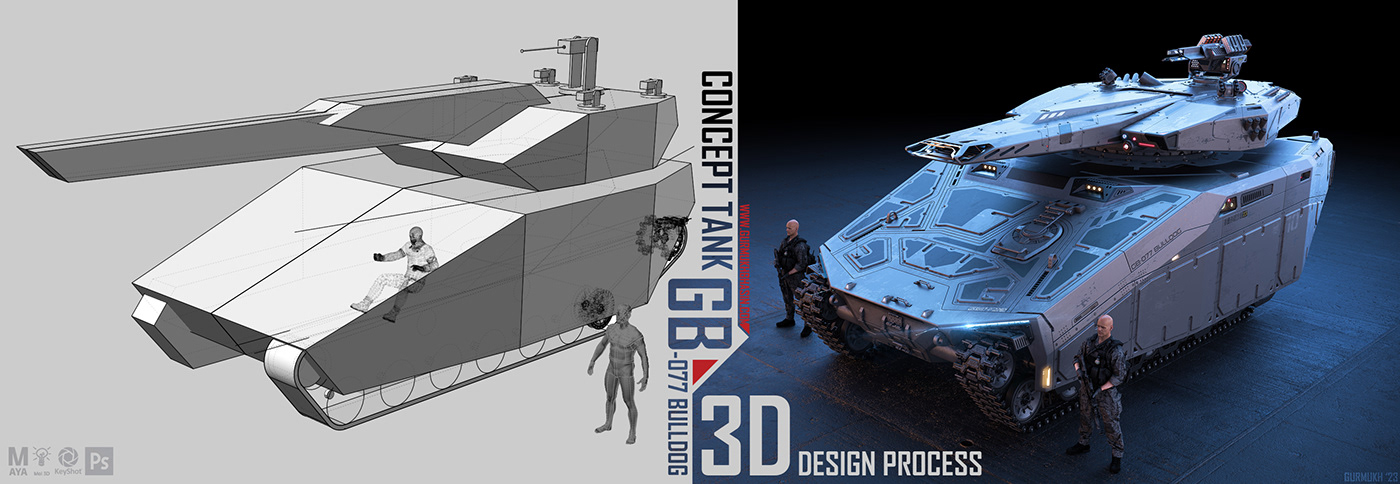
I love designing vehicles, weapons and environments in 3D and have always wanted to have a go at designing my own tank. When I first started this project, I imagined it would be quick and easy to design because it is basically a turret on tank treads... I was so wrong. Figuring out every little detail of something I design is an obsession of mine, and this project was just that. Once I dove in, I wanted to figure it all out, down to the nuts and bolts. Below you will see a glimpse into what it took to create this design and my thoughts behind the moves I made.
I do most of my highly detailed 3D design work in Moment of Inspiration 3D (MOI3D). It is a NURBS CAD modeling tool that is fun and easy to use. It allows me to go crazy with details without worrying about topology or poly counts. Because I am a 3D Concept Designer, my job is to come up with an original design and not worry about the technical limitations of a 3D model. MOI3D is good for high detail modeling and free flowing design, but Maya is better at putting things into place and bringing all the parts together to create the full vehicle.
Step 1 -
Simply blocking in the overall basic large shapes and roughly placing key components where they functionally need to go is how to get the project started. Using 3D scale figures standing and sitting to help design the overall mass of the vehicle around them will help relate the design to the human scale and ground the design in functionality. Luckily for me, I am not reinventing how a tank works and finding reference images and breakdowns of tanks online help me understand how things work.
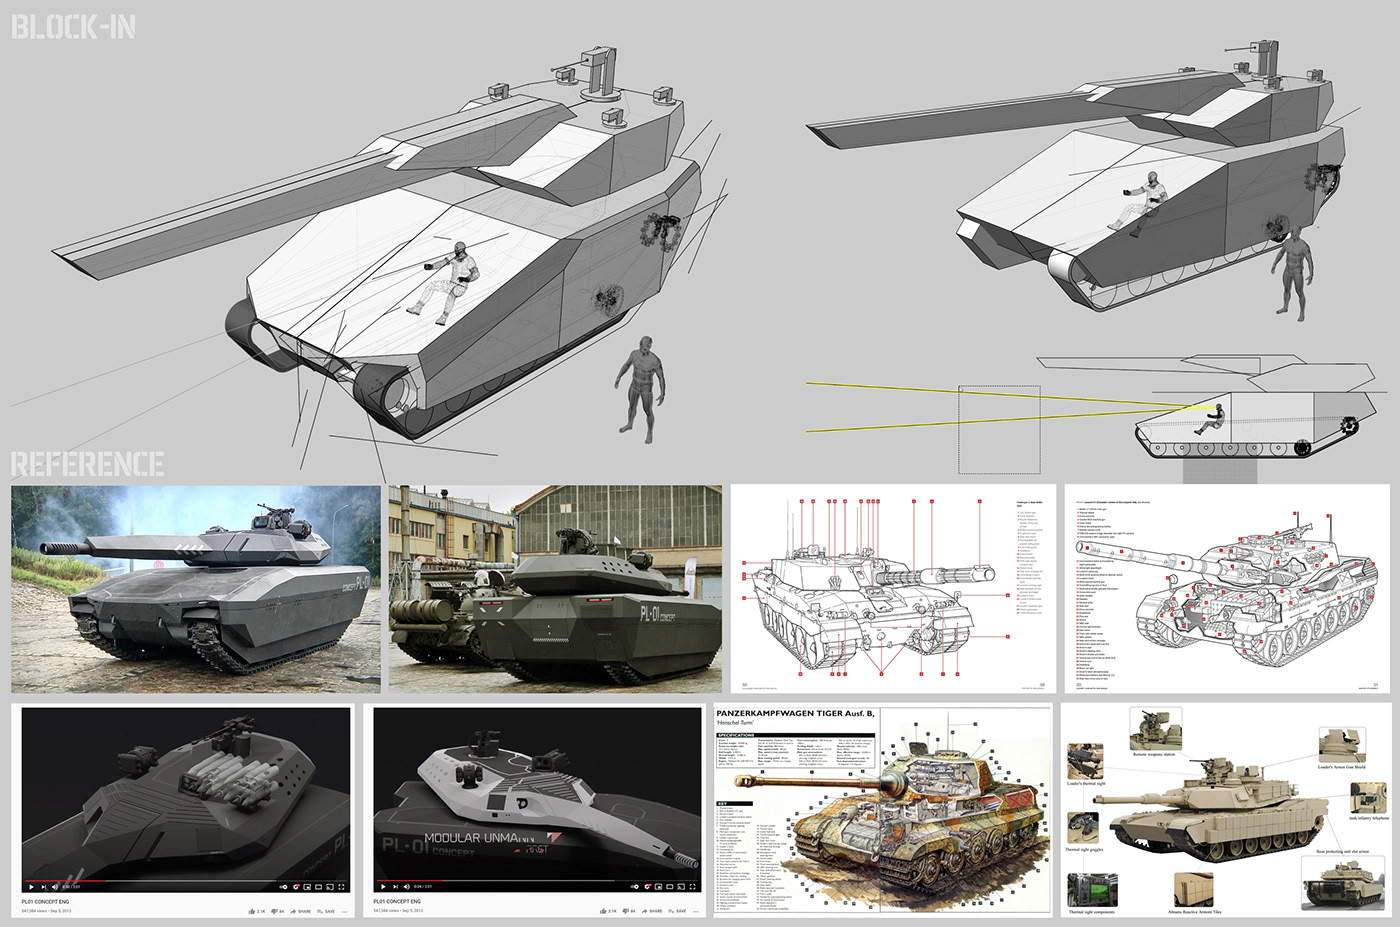
When I first created the very basic block-in, I had a good idea where I wanted the treads to be, and how big I wanted the body, but I wasn't sure how large I wanted the turret or the cannon to be, or what shape that it was eventually going to become. I knew that where the turret attaches to the tank is a place where I can have freedom in the future to drastically change up the block-in shape for the turret. I started to chamfer some edges of the body and played around with angles that gave me a feeling of strength and toughness.
Step 2 -
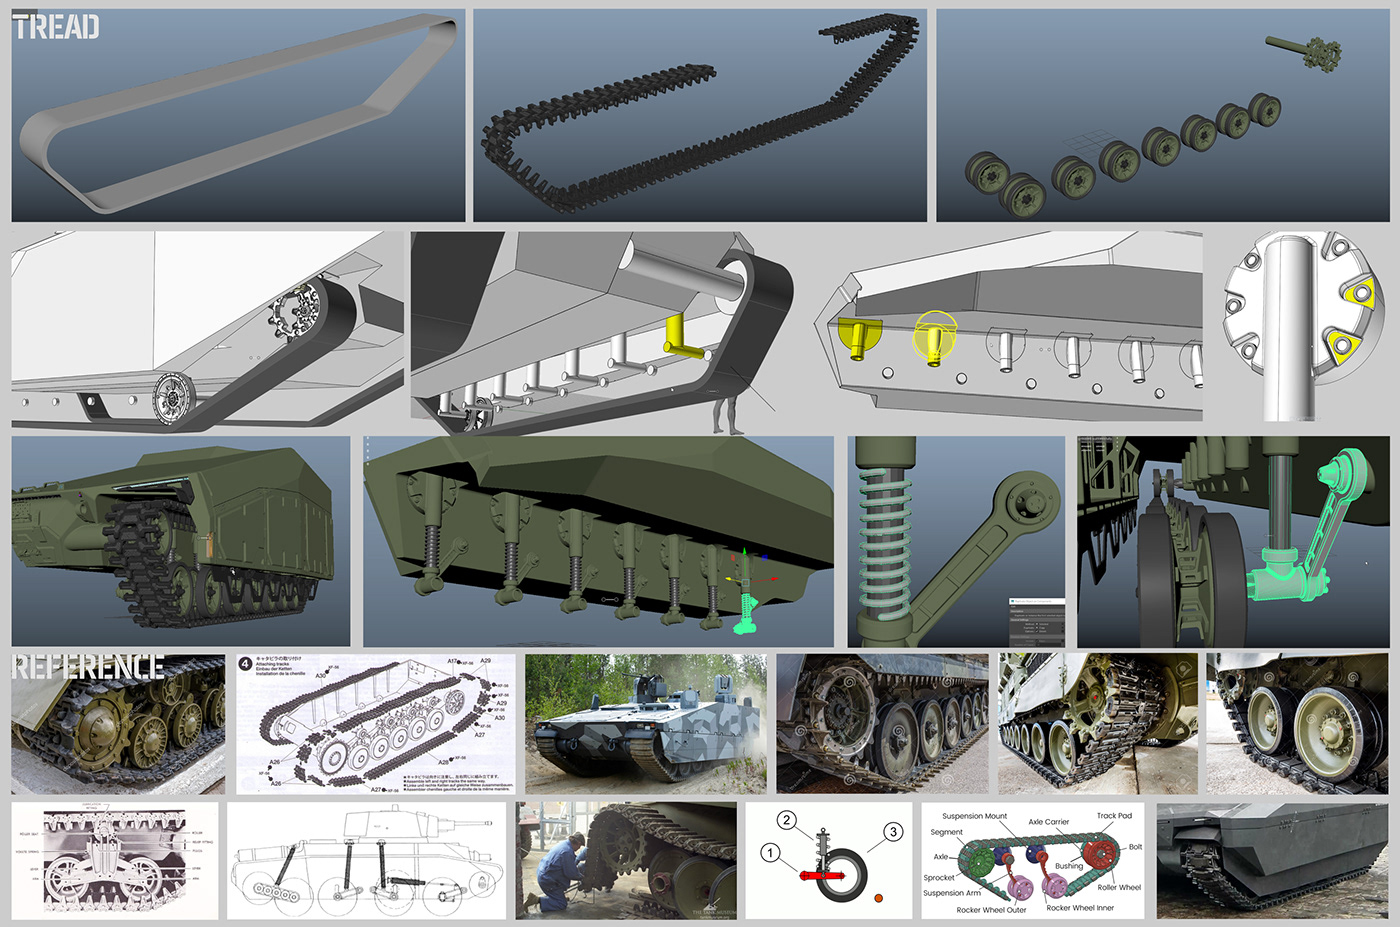
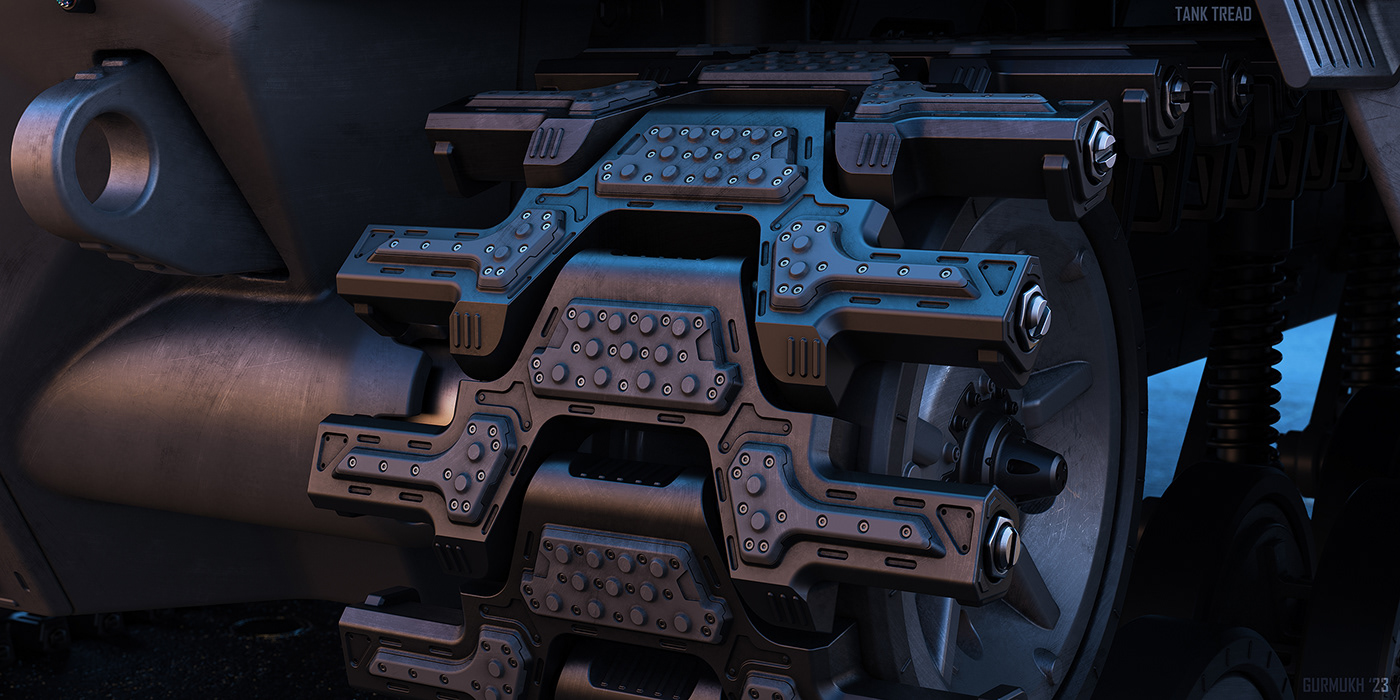
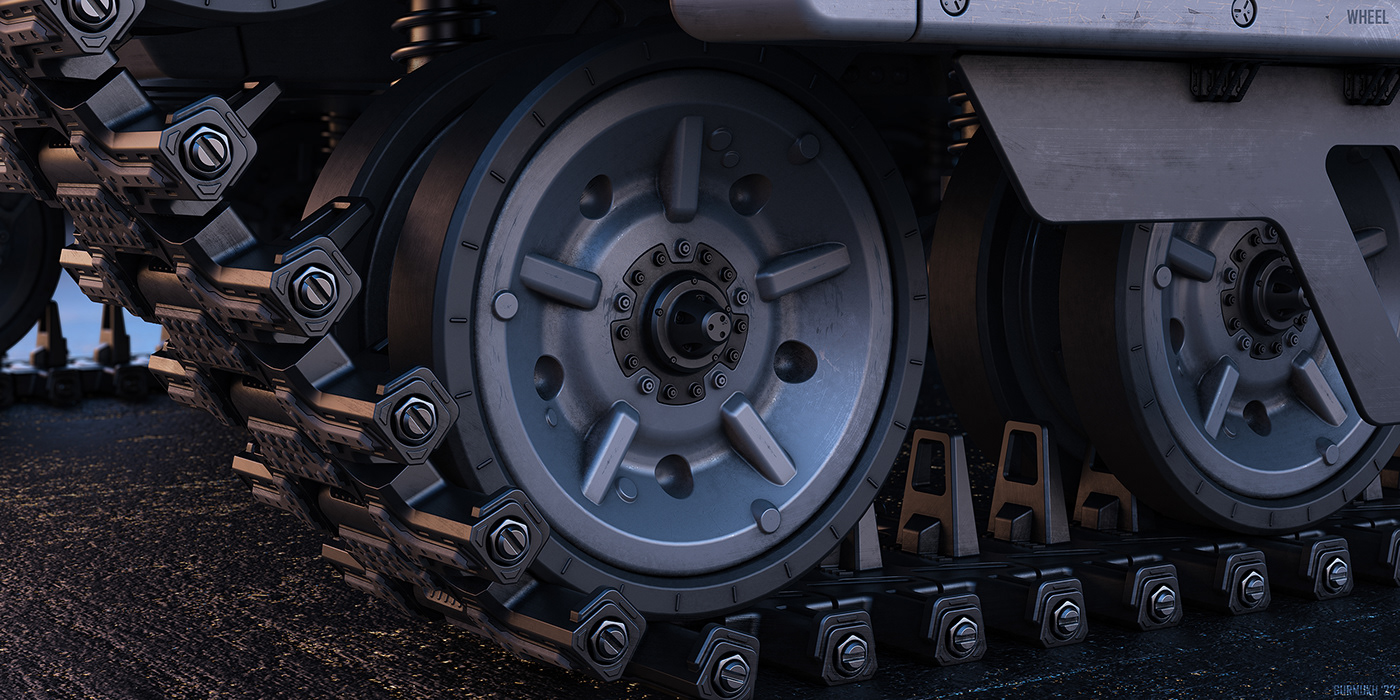
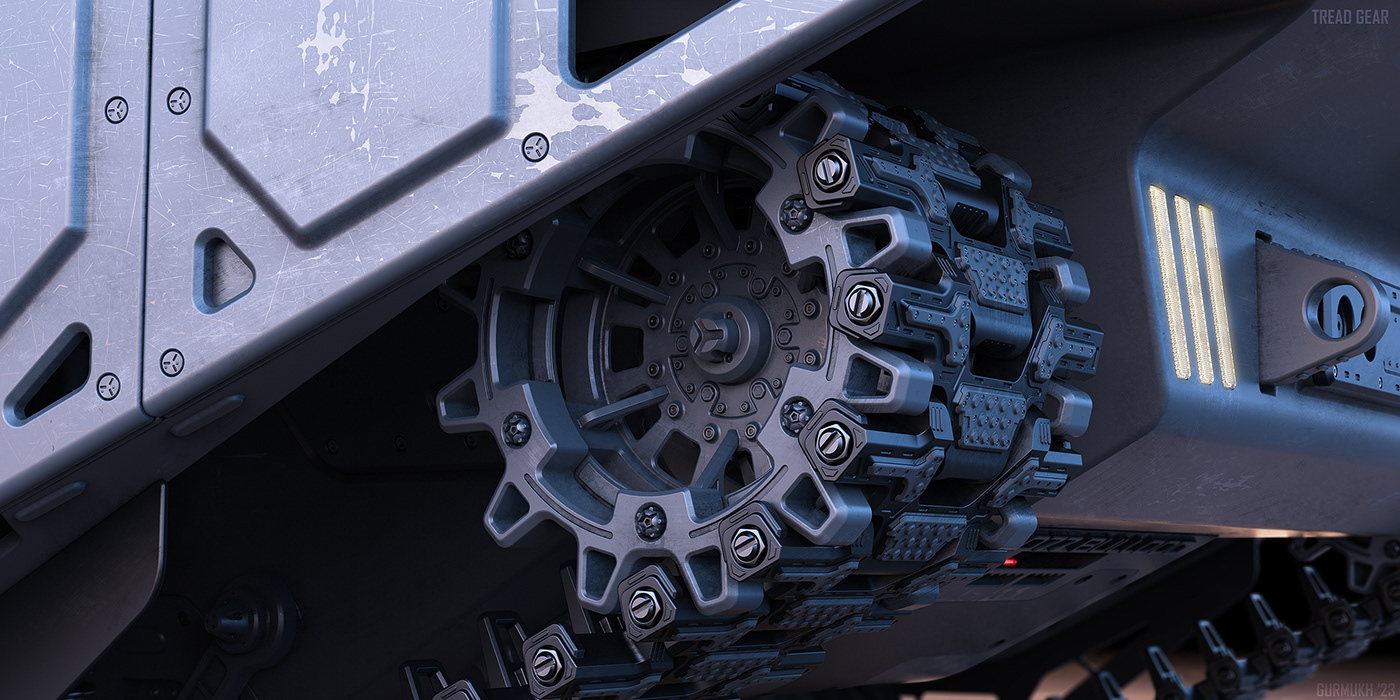
Designing the tread was a fun place to really dive into the details. I started by designing the gear in the back that moves the tread, and then I laid out the spacing to see what size each individual tread piece needs to be. I designed one piece of the tread and brought that into Maya to duplicate and rotate into place to bring the whole tread together. No matter what stage of the design, I always look at references and really try to understand how the thing I am creating works. Basing your design in functionality always leads to a more believable design. Once everything is designed in MOI3D, I export them all to Maya and bring the entire tread system together.
Step 3 -
The front bumper is the next piece of the puzzle. I don't necessarily know what I want to do with a design, so I just start playing around with curves that slice up the large shape and get a feel for things that I like. This usually leads to places where I can tuck details in corners and find ways to break up large surfaces, and the design just kind of figures out itself. Of course, looking at references and seeing what real world tanks and other vehicles do helps me come up with ways to try things on my own.

Step 4 -
The side panels are next and the design is based on functionality to provide protection for the tread, but they also need to be removable so if the tread falls off its tracks it can be fixed. I always go in and figure out as many details as I can on every part of a vehicle I am designing. Even if that part might not be seen. The frame behind the side panels is a good example of this. Just in case the camera in some of the final renders might catch a glimpse of this detail, I make sure it is there so the final is a complete design.

Step 5 -
When designing the front panels, I was thinking of radar camouflage and a different way to visually represent how this vehicle can hide from radars trying to find it. I imagined a system where the dark parts are made of a material that can send out different intensities of heat waves which make the overall shape appear to be something it is not on radar systems. This also gives a nice visual look to the overall design and helps breakup the large surfaces with more detail.

Step 6 -
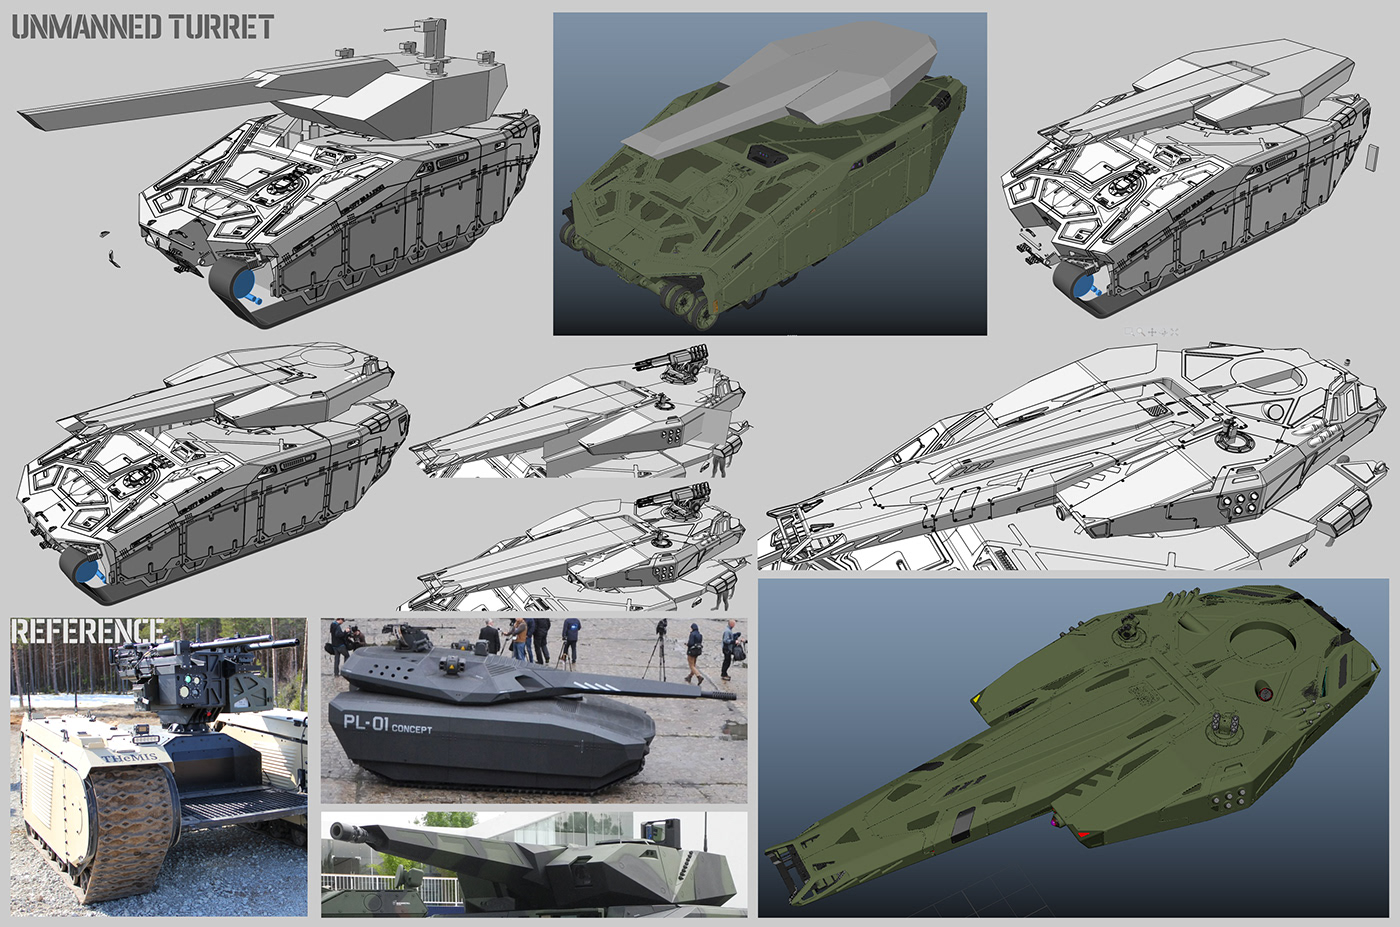
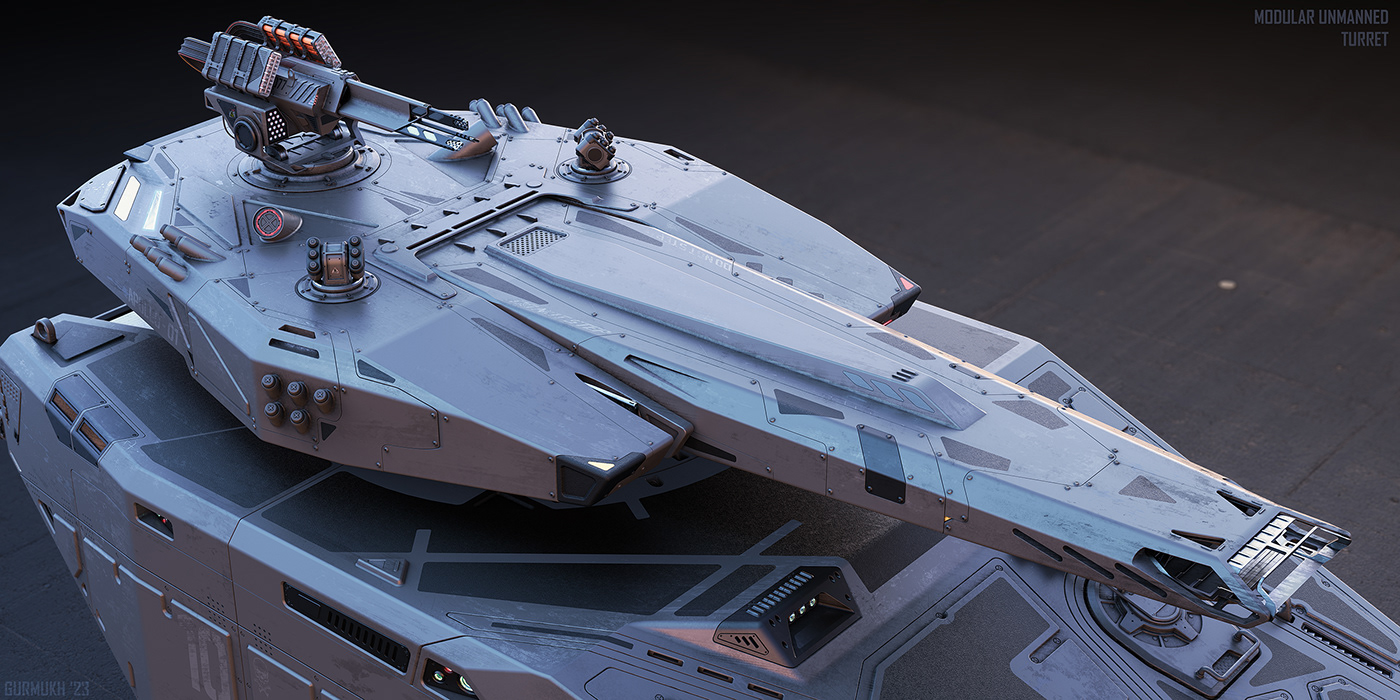
Once the body and tread of the vehicle's 3D design was complete, it was now time to focus on the turret. I wasn't sure what I wanted to do in the beginning, but now I could finally focus on coming up with something that worked nicely with the rest of the vehicle. As you can see in the screenshots below, the shape of the turret changed drastically from the original temporary block-in. I decided that I was playing it too safe with the design of this vehicle so I ended up making the turret a high powered laser cannon for a more fictional/futuristic design. Clearly I don't know how this would function, but using reference and my imagination I came up with something that made sense to me. There are plenty of unmanned weapons to help understand what parts are necessary to make this design more believable.
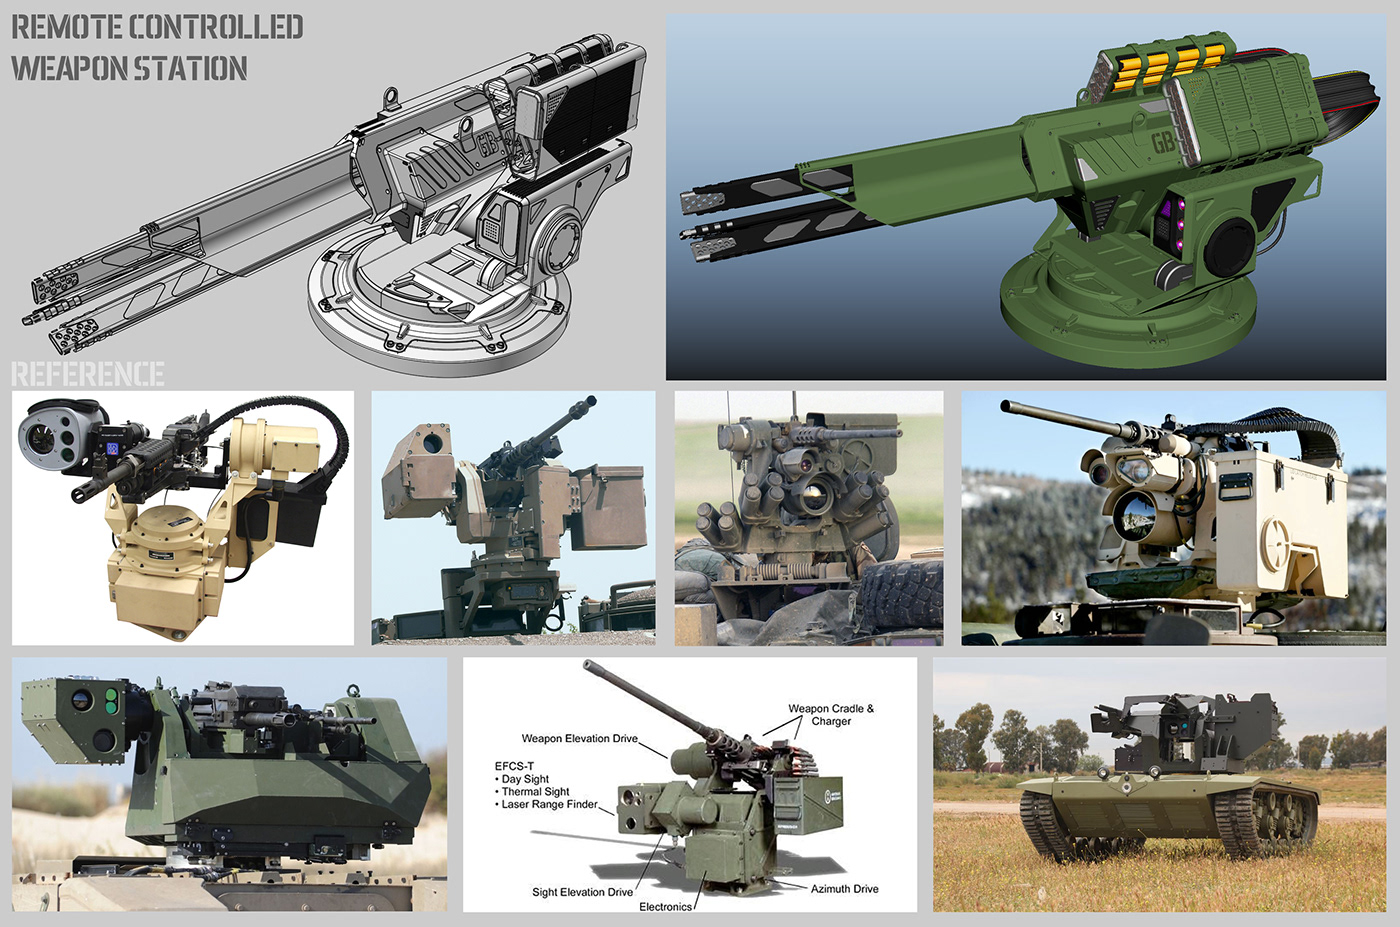
The turret has, smoke grenade launchers, active protection system launchers, radar sensors, laser warning systems, day/night panoramic sights, panoramic observation systems, coaxial laser gun, remote controlled weapons station, modular armor, radar absorbing camouflage, kamikaze drone launchers, and the high powered laser cannon.
MOI3D to Maya wireframe

Step 7 -
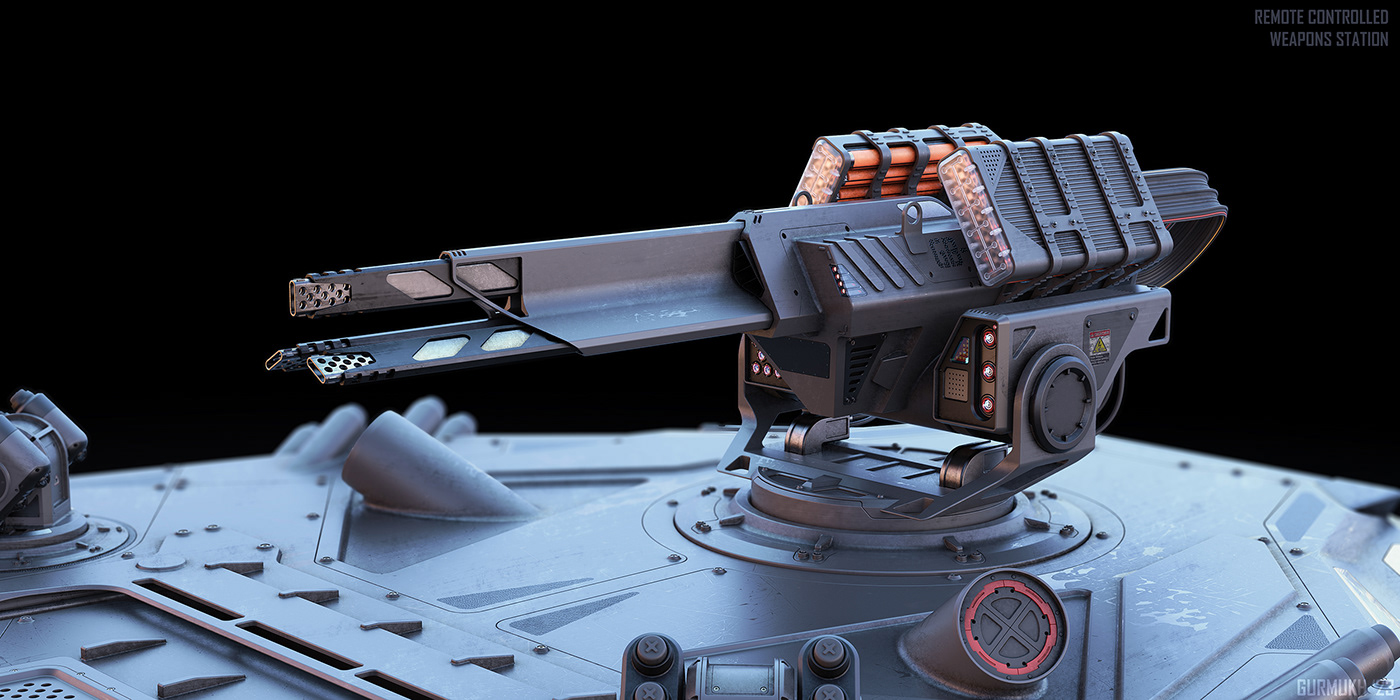
For the remote controlled weapon station I came up with a more fictional/futuristic design. I went with a gimbaled, battery powered, rapid fire, 3 barreled, laser gun. This is used to protect the vehicle against smaller and closer targets.
Step 8 -
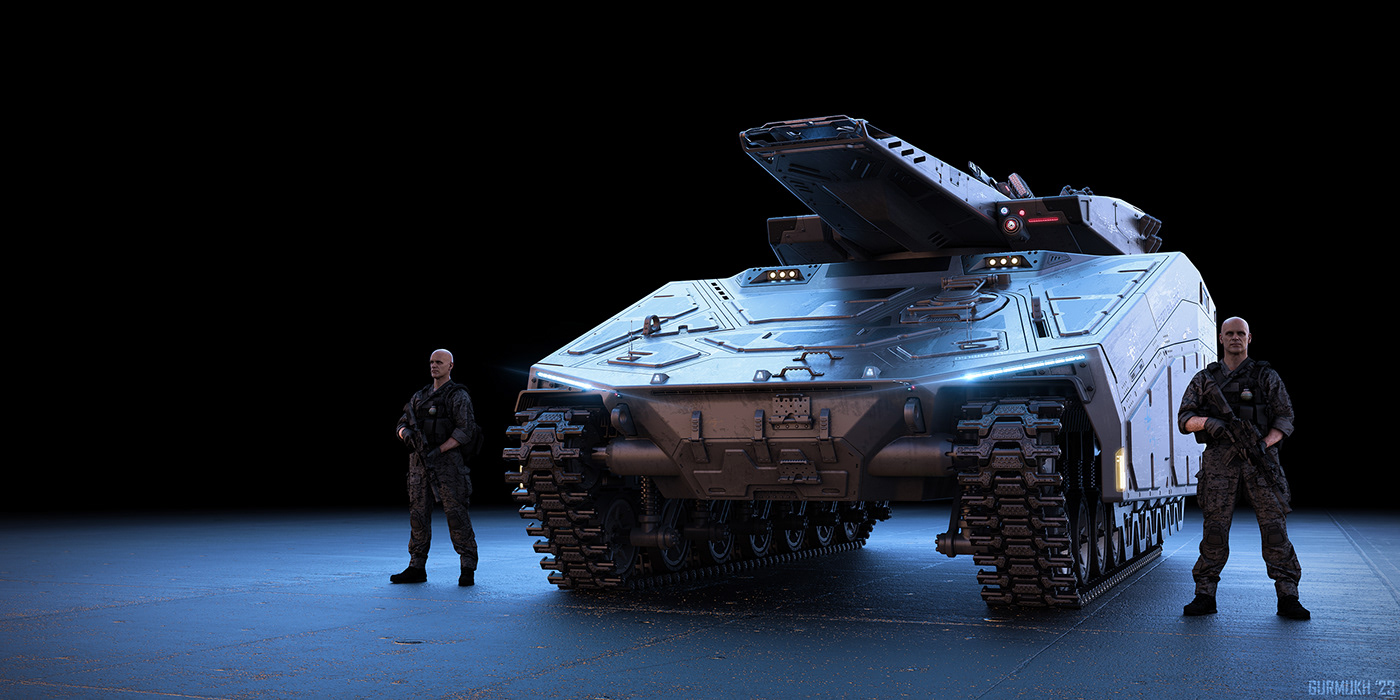
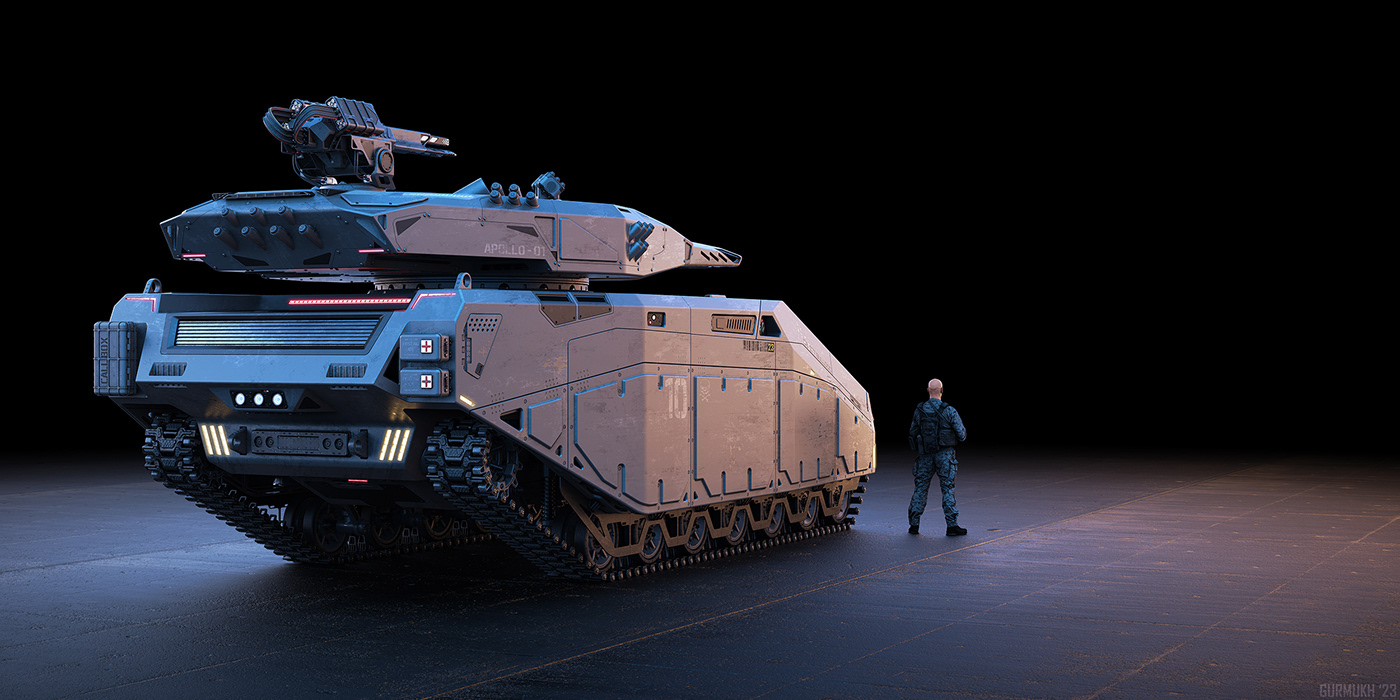
Once all the 3D design is finished in MOI3D and brought together in Maya, I send the 3D model over to keyshot to create the final renders. In Keyshot I play around with materials, lights, environmental lighting and colors to discover the final mood I am going for. Keyshot is flexible, fun, easy to use and gives stunning final results. A little touchup in photoshop and we are good to go. I render out multiple views and some closeup shots of the details to really show off all the hard work that went into the design of this project. Finally we can call this project DONE!!!


THANK YOU FOR READING!! Please let me know if you have any questions.


